<Raspberry Pi-53>
Raspberry Pi-52のPWMは、ボタンで制御していましたが、今度はスライダーを使ったやり方を紹介します。
スライダーは、連続可変出来て使い勝手がいいと思います。
 必要ファイルはconfig、index.htmlとscript.pyで、/home/pi/webiopi_kisoフォルダを作成し
ここに置きます。
それでは、下記の①②③を行っていきます。
①/etc/webiopi/configファイルで、index.htmlとscript.pyを/home/pi/webiopi_kisoフォルダに置く設定をします。
(下の←←←←←ここですを追加)
#------------------------------------------------------------------------#
[SCRIPTS]
# Load custom scripts syntax :
# name = sourcefile
# each sourcefile may have setup, loop and destroy functions and macros
#myscript = /home/pi/webiopi/examples/scripts/macros/script.py
myscript = /home/pi/webiopi_kiso/script.py #←←←←←ここです
#------------------------------------------------------------------------#
[HTTP]
# HTTP Server configuration
enabled = true
port = 8000
# File containing sha256(base64("user:password"))
# Use webiopi-passwd command to generate it
passwd-file = /etc/webiopi/passwd
# Change login prompt message
prompt = "WebIOPi"
# Use doc-root to change default HTML and resource files location
#doc-root = /home/pi/webiopi/examples/scripts/macros
doc-root = /home/pi/webiopi_kiso #←←←←←ここです
# Use welcome-file to change the default "Welcome" file
#welcome-file = index.html
#------------------------------------------------------------------------#
②index.html(<は半角に修正のこと)
-------------------------------------------------------------------------------
<!DOCTYPE html>
<html lang="ja">
<head>
<meta charset="UTF-8">
<title>PWM制御</title>
<script type="text/javascript" src="/webiopi.js"></script>
<script>
//webiopi起動時のSpeedlevel値の設定
webiopi().ready( function(){
Speedlevel( 50 ); //speed初期値(pwmのデューティ比))
} );
//スライダを使ったときのSpeedlevel値の設定
function changeValue(value) {
Speedlevel(value);
}
//Speedlevel値をscript.pyに渡す
function Speedlevel(level){
webiopi().callMacro( "Speedlevel", level); // Speed制御
}
</script>
</head>
<body>
<center>
<input type="range" min="0" max="100" step="1" value="50" onchange="changeValue(this.value)" style="width:500px">
</center>
</body>
</html>
-------------------------------------------------------------------------------
③script.py
-------------------------------------------------------------------------------
import webiopi
GPIO = webiopi.GPIO
SPEED_PWM = 25
GPIO.setFunction( SPEED_PWM, GPIO.PWM )
@webiopi.macro
def Speedlevel( level ):
GPIO.pwmWrite( SPEED_PWM, int(level)/100 )
-------------------------------------------------------------------------------
webiopiを起動させます、コマンドラインから、下のように打ち込みます。
pi@raspberrypi:~ $ sudo /etc/init.d/webiopi start
停止はstartをstopにする
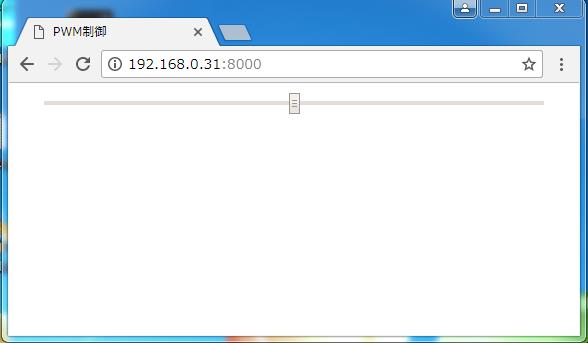
そして、webブラウザから、http://192.168.0.30:8000/にアクセスするとスライダーが
表示します。(IPアドレスは自分の環境)
また、Raspberry Piの電源ON時に自動起動させるには、下記の/etc/rc.localファイルの
←ここを追加をすれば、自動で起動します。
/etc/rc.local
---------------------------------------------------------------------
#!/bin/sh -e
#
# rc.local
#
# This script is executed at the end of each multiuser runlevel.
# Make sure that the script will "exit 0" on success or any other
# value on error.
#
# In order to enable or disable this script just change the execution
# bits.
#
# By default this script does nothing.
# Print the IP address
_IP=$(hostname -I) || true
if [ "$_IP" ]; then
printf "My IP address is %s\n" "$_IP"
fi
sudo /etc/init.d/webiopi start #←ここを追加
exit 0
---------------------------------------------------------------------
Raspberry メニューに戻る
必要ファイルはconfig、index.htmlとscript.pyで、/home/pi/webiopi_kisoフォルダを作成し
ここに置きます。
それでは、下記の①②③を行っていきます。
①/etc/webiopi/configファイルで、index.htmlとscript.pyを/home/pi/webiopi_kisoフォルダに置く設定をします。
(下の←←←←←ここですを追加)
#------------------------------------------------------------------------#
[SCRIPTS]
# Load custom scripts syntax :
# name = sourcefile
# each sourcefile may have setup, loop and destroy functions and macros
#myscript = /home/pi/webiopi/examples/scripts/macros/script.py
myscript = /home/pi/webiopi_kiso/script.py #←←←←←ここです
#------------------------------------------------------------------------#
[HTTP]
# HTTP Server configuration
enabled = true
port = 8000
# File containing sha256(base64("user:password"))
# Use webiopi-passwd command to generate it
passwd-file = /etc/webiopi/passwd
# Change login prompt message
prompt = "WebIOPi"
# Use doc-root to change default HTML and resource files location
#doc-root = /home/pi/webiopi/examples/scripts/macros
doc-root = /home/pi/webiopi_kiso #←←←←←ここです
# Use welcome-file to change the default "Welcome" file
#welcome-file = index.html
#------------------------------------------------------------------------#
②index.html(<は半角に修正のこと)
-------------------------------------------------------------------------------
<!DOCTYPE html>
<html lang="ja">
<head>
<meta charset="UTF-8">
<title>PWM制御</title>
<script type="text/javascript" src="/webiopi.js"></script>
<script>
//webiopi起動時のSpeedlevel値の設定
webiopi().ready( function(){
Speedlevel( 50 ); //speed初期値(pwmのデューティ比))
} );
//スライダを使ったときのSpeedlevel値の設定
function changeValue(value) {
Speedlevel(value);
}
//Speedlevel値をscript.pyに渡す
function Speedlevel(level){
webiopi().callMacro( "Speedlevel", level); // Speed制御
}
</script>
</head>
<body>
<center>
<input type="range" min="0" max="100" step="1" value="50" onchange="changeValue(this.value)" style="width:500px">
</center>
</body>
</html>
-------------------------------------------------------------------------------
③script.py
-------------------------------------------------------------------------------
import webiopi
GPIO = webiopi.GPIO
SPEED_PWM = 25
GPIO.setFunction( SPEED_PWM, GPIO.PWM )
@webiopi.macro
def Speedlevel( level ):
GPIO.pwmWrite( SPEED_PWM, int(level)/100 )
-------------------------------------------------------------------------------
webiopiを起動させます、コマンドラインから、下のように打ち込みます。
pi@raspberrypi:~ $ sudo /etc/init.d/webiopi start
停止はstartをstopにする
そして、webブラウザから、http://192.168.0.30:8000/にアクセスするとスライダーが
表示します。(IPアドレスは自分の環境)
また、Raspberry Piの電源ON時に自動起動させるには、下記の/etc/rc.localファイルの
←ここを追加をすれば、自動で起動します。
/etc/rc.local
---------------------------------------------------------------------
#!/bin/sh -e
#
# rc.local
#
# This script is executed at the end of each multiuser runlevel.
# Make sure that the script will "exit 0" on success or any other
# value on error.
#
# In order to enable or disable this script just change the execution
# bits.
#
# By default this script does nothing.
# Print the IP address
_IP=$(hostname -I) || true
if [ "$_IP" ]; then
printf "My IP address is %s\n" "$_IP"
fi
sudo /etc/init.d/webiopi start #←ここを追加
exit 0
---------------------------------------------------------------------
Raspberry メニューに戻る